The exposure triangle is a very important thing to understand about your camera. As a photographer we need to accurately let the correct amount of light fall on the sensor to record the image you want to create. This is referred to as the exposure.
Too little light and the image will be created dark and we call that underexposed. Too much light and the image will be too bright and we call that overexposed.
There is in fact no such thing as a universally correct exposure, the exposure needs to be creating images that suit your artistic vision. Your vision may be to create dark and moody images which is often called low key or bright images often called high key. Your vision may be to create images of what the camera sees and this is often referred to as the correct exposure. However the camera being a machine can get confused and create images that are not the exposure that you want because it calculates the exposure on the specific thing that you point it at.
Underexposed
As Camera Sees
Overexposed
Three Light Controls
There are three camera settings that control how much light is let into the camera to fall on the sensor and create your exposure. These are
Aperture, Shutter Speed and ISO
It’s important that we understand what each setting does so we know what adjustments to make when shooting in different lighting conditions to create your images.
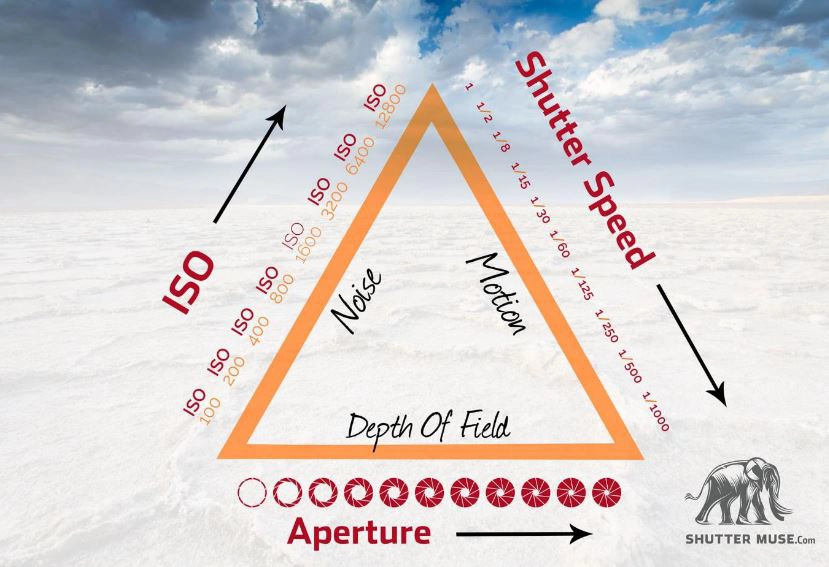
The Exposure Triangle
The exposure triangle shows us how changing one of your camera settings affects the values of the other two settings.
Measuring Exposure
The idea of a correct or perfectly exposed image is one that is not too dark and not too light. To make this work we need a system to quantify the light. As a photographer we have such a system called the stop. The stop is not really specifically related to photography, its mathematical but allows us to
link Aperture, Shutter Speed and Iso together so if we change one of the settings we know how to change the others to maintain the same exposure.
The stop is a doubling or halving and it matters not what you are doubling or halving.
For example if you have a pound in your pocket then your wealth is £1. If I give you another £1 then your wealth has increased by 1 Stop.
The same maths can be applied to light, if you have one light in your studio and I bring another light of the same size then the light in the room would have increased by 1 stop or doubled.
If we take a picture of a landscape say and it comes out dark or underexposed we can ‘stop up’ or ‘Stop Down’ by changing one of the settings in the exposure triangle, Aperture, Shutter Speed or ISO to increase or decrease the amount of light hitting the sensor.
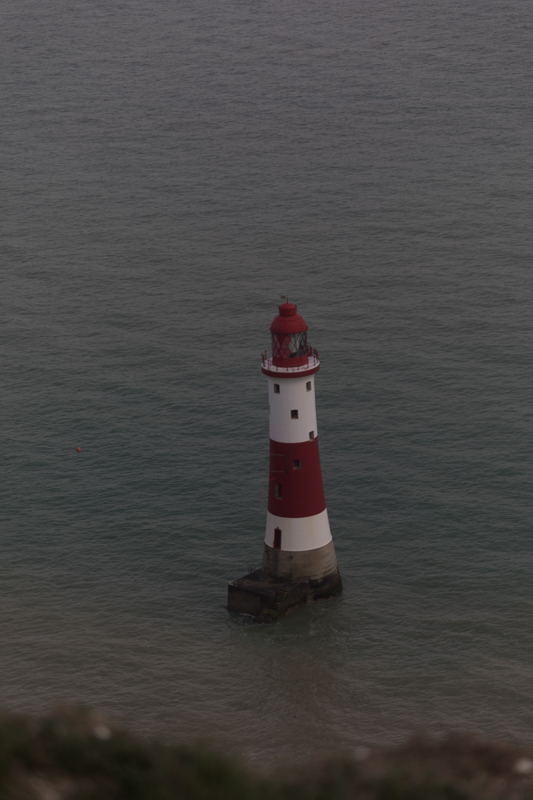
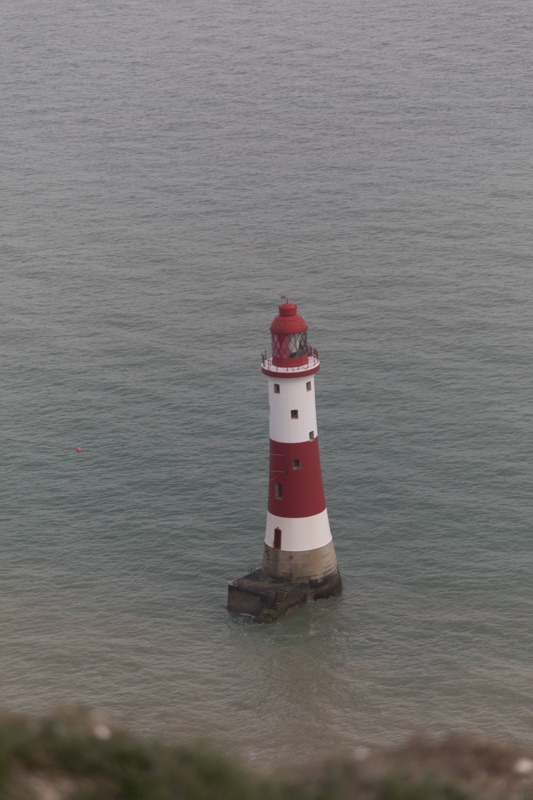
In the following image I wanted to remove the sky easily in post processing so I deliberately over exposed the image by allowing the shutter to be open longer to allow more light in to brighten the image
What is Aperture ?
Aperture is the opening in your lens that lets the light through to the sensor.
A wide Aperture means that more light is allowed through to the sensor. This will allow you to use a faster shutter speed or lower ISO settings to maintain the exposure.
A smaller Aperture lets less light in and will require either a slower Shutter Speed or ISO to maintain the same exposure.
Aperture is measured in F Stops and is identified using numbers like f/2.8, F5.6, F11 etc. A small f stop like f/2.8 actually means a large hole and a large f stop(F/22) is a small hole.

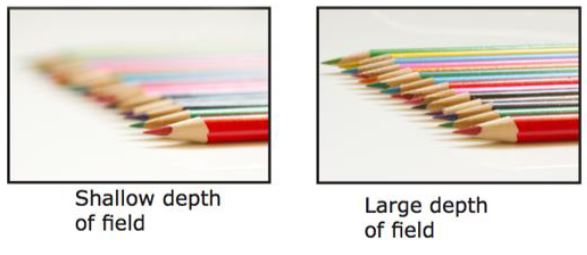
As well as controlling light the aperture also controls another creative aspect of photography called Depth Of Field or Bokeh. At a large aperture F2.8 the lens creates a very narrow depth of field, this being the area in the image in acceptable focus. Behind and in front of this area go blurry. This is great for portrait photography to blur the areas surrounding your subject to keep your viewers eye on the main subject.
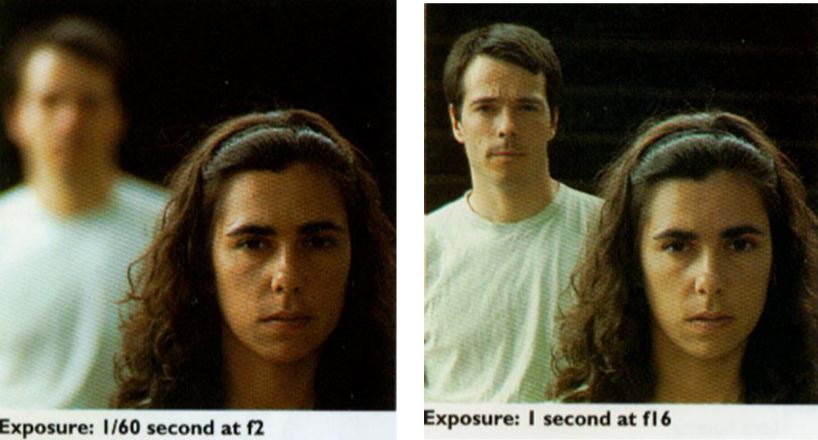
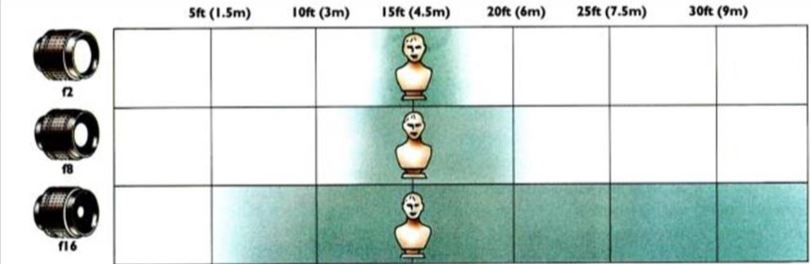
A large aperture number like F16 will give a much larger depth of field and so
would be good for landscape photography where you need everything to be in focus and sharp.
Shutter Speed
Shutter Speed refers to the amount of time the shutter is open while capturing your image.
Shutter Speed is measured in whole seconds or fractions of a second such as 1/100s, 5 second etc. The longer the exposure time, the more time light has to burn itself onto your camera’s sensor. A faster shutter speed will therefore have the opposite effect – giving less time for light to hit the sensor. Less time means less light.
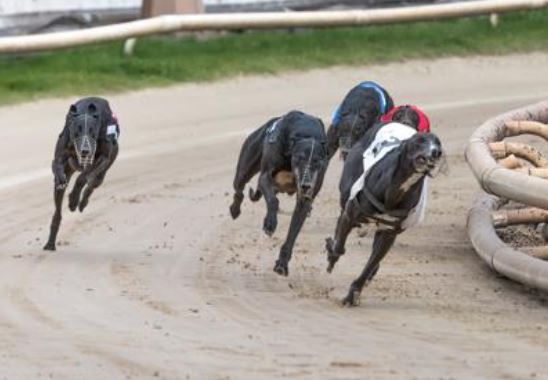
Just like aperture, shutter speed affects another creative effect in your image, motion. A slow shutter speed will introduce motion blur, which is where objects in your picture move during the exposure time, thus becoming blurry.
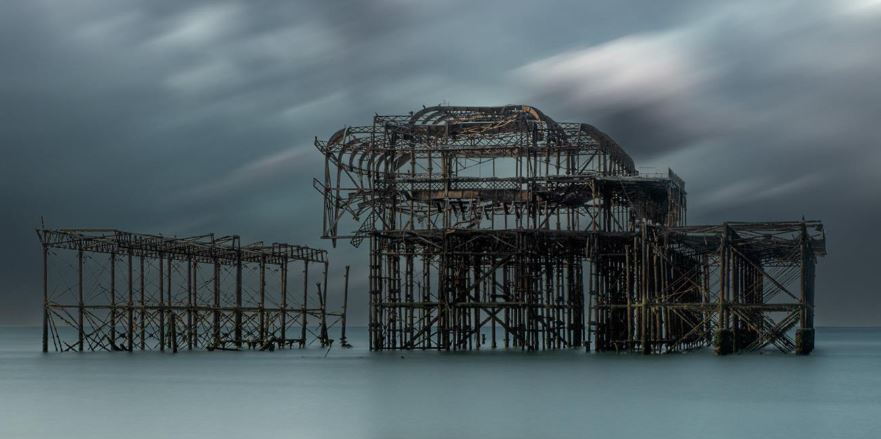
In the image above a long shutter speed has introduced blur into the clouds and sea as they were moving while the shutter was open. A fast shutter speed freezes motion as you would see in sports photography.
ISO
Back in the days of film cameras, ISO was a measure of the film’s sensitivity to light. A roll of film would come with a fixed ISO value, and photographers would need to select the right film based on shooting conditions.
Today we have digital cameras that can change the ISO values directly on the camera’s sensor on–the– fly to suit the light conditions that you are faced with.
ISO usually starts at 100 (but some cameras go down to 50 or lower) and goes up in increments, with higher numbers being more sensitive than lower ones.
What this means is if you select a lower ISO, your sensor won’t have a lot of sensitivity to light.
However if we select a higher ISO, the digital sensor is very sensitive to light and hoovers up all the available light very quickly meaning you don’t need a lot of it in the conditions to appear in the image.
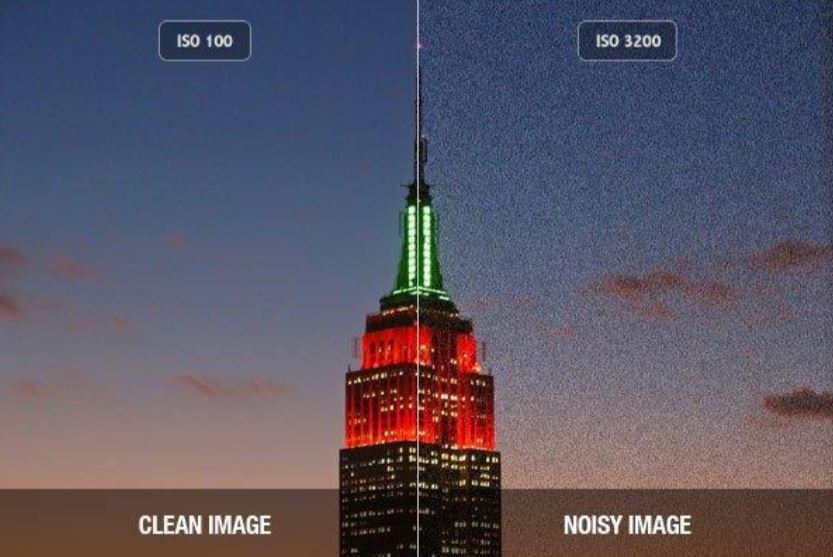
ISO also has its effects on photography, in the form of noise.
A low ISO generally results in a cleaner image with less grain, but needs either a wide–enough aperture or slower shutter speed to compensate for the low sensitivity.
A high ISO, on the other hand, needs less light to produce a similar effect but will result in what’scalled digital noise, which appears as grain in the darker parts of the photo.
f/8, 1/100s, ISO 400
Let’s suppose that we’re taking a photo of a beach at sunset and that the settings above will result in a perfectly exposed photo where there are lots of details in the highlights (bright parts of the image)
and shadows (dark parts of the image).
If we leave shutter speed and ISO where they are and make the aperture smaller say (f/11), the image will become darker because less light is coming in as we have made the hole smaller ie we have stopped down.
If we make the aperture wider (f/4), the image will become brighter, overexposing the photo as we have made the hole bigger letting more light in, we have opened up the aperture.
Lets take back the aperture to f/8 and change the shutter speed to 1/50s.
By increasing how long the shutter is open there is more time for light to come through the camera lens and hit the sensor, meaning the image will be brighter and if anything is moving it will start to blur.
So shutter speed controls the second creative effect in your image, blur motion or freeze motion.
By speeding up the shutter speed to say 1/200s the image will become darker because there is less time for light to hit the sensor.
ISO
Lets take the shutter speed back to 1/100s and change the ISO.
Reducing the ISO to ISO100 will make the sensor less sensitive and will result in the amount of light coming through the aperture in the length of time dictated by the shutter speed won’t be enough to properly expose the image.
Turn the ISO up to ISO1600 and the opposite will happen. The sensor will be more sensitive so the light the Aperture and shutter Speed is gathering and the image will be brighter. A downside of higher ISO is the production of digital noise. However modern cameras have sensors with a good response to noise with in camera noise reduction. Post processing software also now is very good atremoving noise from your images.
Conclusion
Well that’s it you are now fully passed out on controlling the exposure of your images and how different settings like f stop numbers and ISO interact with each other.